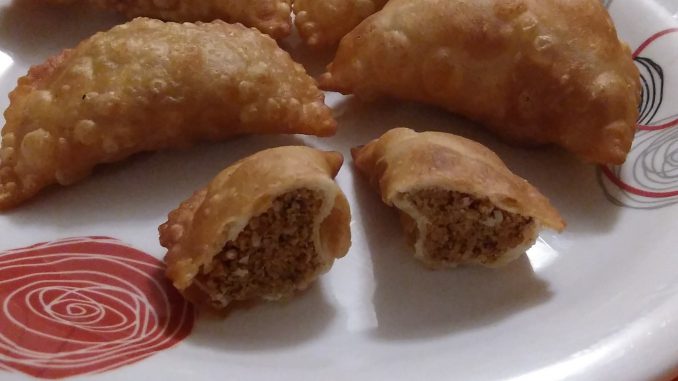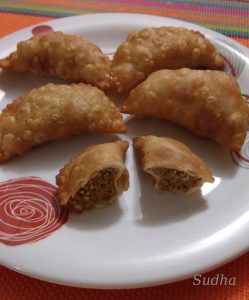
Namkeen Karanji (तिखटमिठाची (नमकीन) करंजी) – Gujiya with a Twist
तिखटमिठाची (नमकीन) करंजी मराठी
These are savory Gujiya – a twist to normal sweet Gujiya. I use Dry Coconut, Sesame Seeds and Poppy Seeds mixed with Chilly Powder, Mango Powder as filling. Gujiya are very very yummy. Try this out. I’m sure you will love the twist. These will last for 8-10 days at room temperature.
Ingredients (For 30 – 32 Karanji) (1 cup = 250 ml)
Maida (All purpose flour) ¾ cup
Rava Barik (Semolina Fine ) ¾ cup
Milk 1 cup (Approx)
Pure Ghee (Clarified Butter) 1.5 tablespoon
Grated Dry Coconut 1.5 cup
Sesame Seeds ¼ cup
Powdered sugar 2 tablespoon (adjust as per taste)
Chilly Powder 1 teaspoon
Mango Powder ½ teaspoon
Poppy Seeds 1 tablespoon
Salt to taste
Oil To Fry
Instructions
Prepare Dough
1. Mix 1.5 tablespoon of pure Ghee, a pinch of salt, semolina fine (rava barik) and All Purpose Flour.
2. Add little milk at a time and Bind a stiff consistency dough.
3. Let it rest for 4-5 hours.
Prepare Filling
1. Dry roast sesame seeds till light brown. Keep it aside to cool.
2. Dry roast Poppy Seeds till light brown. Keep it aside to cool
3. Dry roast grated coconut till light brown. Keep it aside to cool
4. Grind Poppy Seeds and sesame seeds separately into a coarse powder. Use pulse mode of grinder for a few seconds; else the powder will be oily.
5. Crush roasted coconut by hand
6. Mix Sesame Seeds powder, Poppy Seeds powder, powdered sugar, chilly powder, Mango Powder and salt with crushed coconut. Make sure filling is little more spicy than what you normally have.
7. Filling is ready.
Preparing Karanji
1. Make ½ inch round balls from the dough.
2. Roll each ball into a 3 inches round (puri).
3. Place 1 tablespoon of Filling in the center of the “puri”.
4. Fold the “puri” over to make it a semi-circle.
5. Seal the edges using drop of milk, pressing gently with fingers.
6. Trim the edges. “karanji” is ready for frying.
7. Keep the karanji covered with a thin wet (not dripping) cloth, to avoid it getting dry.
8. Repeat step 2 to 6 for all the dough.
Frying Karanji
1. Heat Oil in a wok on low flame.
2. Gently slip the above “karanji” into the heated oil.
3. While frying keep splashing some heated oil on the top side so that the top side is also fried.
4. Turn the “karanji” in the oil for frying all sides.
5. Fry till light brown on both sides.
6. Remove from oil and place it on tissue (this helps to soak the excess oil).
7. On cooling, store in air tight container. These will last for 8-10 days without refrigeration.

===================================================================================
तिखटमिठाची (नमकीन) करंजी
करंजी म्हटली की गोड करंजी च डोळ्यासमोर येते. मी तिखटमिठाच्या करंज्या बनवते. ही माझी स्वतःची रेसिपी आहे.
सुकं खोबरे, तीळ, खसखस, लाल तिखट, आमचूर घालून बनवलेल्या सारणाच्या करंज्या खूपच चविष्ट लागतात. सणासुदीला ह्या वेगळ्याच प्रकारच्या करंज्या बनवून सगळ्यांना सरप्राइज द्या.
कृती सुक्या खोबऱ्याच्या करंज्यांसारखीच आहे. पण ह्या करंज्या तेलात तळतात.
साहित्य (३०-३२ करंज्यांसाठी ) (१ कप = २५० मिली )
मैदा पाऊण कप
बारीक रवा पाऊण कप
दूध १ कप (अंदाजे)
साजूक तूप दीड टेबलस्पून
किसलेलं सुकं खोबरं दीड कप
तीळ पाव कप
पिठीसाखर २ टेबलस्पून (चवीनुसार कमी / जास्त करा)
लाल तिखट १ टीस्पून
आमचूर अर्धा टीस्पून
खसखस १ टेबलस्पून
मीठ चवीनुसार
तेल तळण्यासाठी
कृती
१. पारीसाठी मैदा, रवा, साजूक तूप, चिमूटभर मीठ एकत्र करा. आणि दुधामध्ये घट्ट भिजवा. ४–५ तास झाकून ठेवा.
२. सारणासाठी किसलेलं सुकं खोबरं मंद आचेवर गुलाबी रंगावर भाजून घ्या. तीळ, खसखस वेगवेगळे खमंग भाजून घ्या. गार झाल्यावर वेगवेगळे मिक्सर मध्ये पल्स मोड वर जाडसर वाटून घ्या. खोबरं हाताने चुरून घ्या. खोबरं, तीळ , खसखस, लाल तिखट, आमचूर, पिठीसाखर आणि मीठ नीट मिक्स करून घ्या. करंजीचं सारण तयार आहे.
३. आता करंज्या करण्यासाठी भिजवलेलं पीठ मळून घ्या. छोटया लाट्या बनवून पातळ पुऱ्या लाटून घ्या. प्रत्येक पुरीत चमचाभर सारण घालून पुरीची घडी घालून हलके दाबून बंद करा. चिकटण्यासाठी कडेला दुधाचा थेम्ब लावा. कातण्याने कडा कापून घ्या.
४. तयार करंज्या ओल्या कपड्याने झाकून ठेवा. १५–२० करंज्या झाल्या की गरम तेलात तळून घ्या.
५. तळताना करंजीच्या वरच्या बाजूला तेल झाऱ्याने हलकेच उडवा. करंजीला छान मुखऱ्या आल्या पाहिजेत. दोन्ही बाजू तळून टिशू पेपर वर काढून घ्या.
६. खमंग खुसखुशीत करंज्या तयार आहेत.
७. गार झाल्यावर हवाबंद डब्यात भरून ठेवा. ह्या करंज्या ८-१० दिवस टिकतात.


Your comments / feedback will help improve the recipes