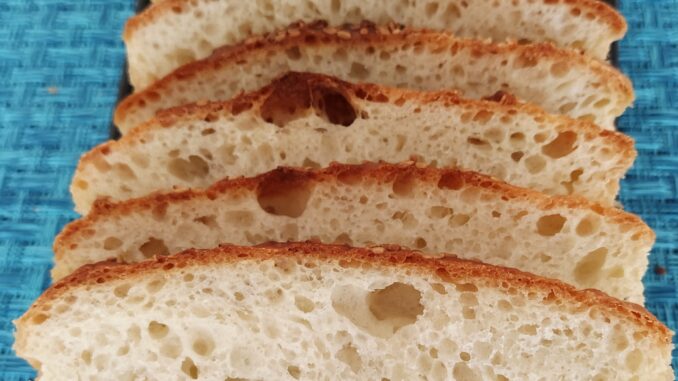
No-Knead Bread (विना मेहनतीचा पाव)
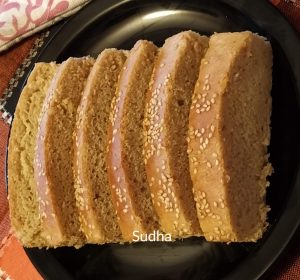
Traditional method of making bread needs a lot of effort in Kneading the dough to release Gluten in the dough. So making the bread frequently is really tiring. Alternatively this ‘No-Knead Bread’ needs practically No Kneading of the dough. So No Hard Work. Some recipes of No-Knead bread mention very long proofing time with very little yeast added while binding the dough. Some other recipes – like this one – use little more Yeast than traditional recipe with lesser proofing time. I’ve tried this recipe with All Purpose Flour (Maida) and with a combination of Whole Wheat Flour, All Purpose Flour. Both breads come out nice and soft. The only difference I noticed was – With a combination of Whole Wheat and All Purpose Flour that dough does not raise as much thereby making lesser quantity of bread. But otherwise there is no difference.
People always ask – what is the alternative to Yeast while baking a bread. If you are very much interested in Baking, try your hands on Sour Dough Bread. It’s a lengthy process and needs lot of patience. But for others like me, My frank opinion is – there is no alternative to Yeast. I did try baking a bread with Baking Soda and Baking Powder. But the texture and taste of the bread was more like a unsweetened Cake/ muffin. So I won’t bake a bread without Yeast.
If you don’t have oven, you can bake Pav using a Wok / Pan.
Ingredients(1 cup = 250 ml)
All Purpose Flour (Maida) 3 cups Or
Whole Wheat Flour And All Purpose Flour 1.5 cups each
Powdered Sugar 1.5 tablespoon
Dry Yeast 2 teaspoon
Salt 1.5 teaspoon
Melted Butter 2 tablespoon
Sesame Seeds 1 teaspoon (optional)
Milk + butter for brushing
Instructions
1. In a bowl, mix flour, salt, powdered sugar and dry yeast.
2. Add melted butter and mix properly.
3. Add little water at a time and bind a soft consistency dough.
4. Transfer the dough to a greased bowl, apply little oil/ butter on the top and keep covered for proofing for 1 hour.
5. Dough will rise. Punch the dough to release excess air.
6. Transfer the dough to a greased bread mould. Level it a bit. Sprinkle sesame seeds on top and tap a bit.
Cover with damp cloth and keep for proofing for 40-45 minutes.
7. Apply little milk on the top. Bake on 200 degrees for 35-40 minutes in a Pre-heated oven till it gets golden brown colour.
8. Apply butter on top. Allow to cool.
9. Enjoy freshly baked soft bread.
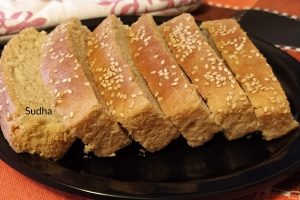
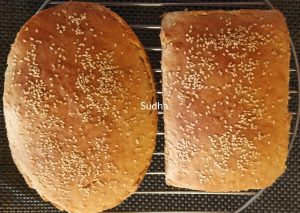
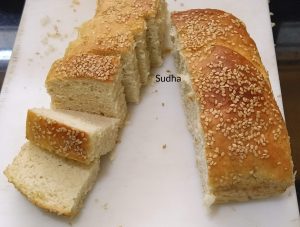
==================================================================================
विना मेहनतीचा पाव
No -knead ब्रेड साठी मला यापेक्षा वेगळं नाव मिळालं नाही. पारंपारिक पद्धतीने पाव करताना पीठ खूप वेळ मळावं लागतं. खूप मेहनतीचं काम आहे. त्यामुळे नेहमी पाव करणं जिकिरीचं काम वाटतं. पण ह्या रेसिपी मध्ये पीठ अजिबात मळावं लागत नाही. म्हणून ‘विना मेहनतीचा पाव‘. ह्या पावाच्या काही रेसिपींमध्ये अगदी कमी यीस्ट घालून पीठ खूप जास्त वेळ फुलण्यासाठी ठेवतात. तर काही रेसिपींमध्ये – ह्या रेसिपी प्रमाणे – यीस्ट थोडं जास्त घालून पीठ फुलण्यासाठी तासभर ठेवलं जातं. मी ही रेसिपी वापरून पूर्ण मैद्याचा तसंच मैदा + कणिक अर्धी अर्धी घालून पाव केला आहे. दोन्ही पाव छान मऊ होतात. टेक्सचर छान येतं. फक्त कणिक+ मैदा घातलेलं पीठ थोडं कमी फुलतं त्यामुळे पाव जरा लहान होतो.
आता सर्वांचा नेहमीचा प्रश्न – यीस्ट ला पर्याय काय? हल्ली sour dough ब्रेड करतात. पण त्याला बरीच मोठी कृती आहे. तुम्हाला बेकिंग मध्ये फार उत्साह असेल तर ते जरूर करा. पण माझ्यासारख्या बाकी सगळ्यांसाठी माझं प्रांजळ मत – यीस्ट ला काहीही पर्याय नाही. मी यीस्ट न वापरता बेकिंग सोडा, बेकिंग पावडर घालून पाव करून बघितला. पण त्याचं टेक्सचर आणि चव अगोड केक / मफिन सारखी लागते. अजिबात पावासारखा लागत नाही. त्यामुळे मी तरी यीस्ट न घालता पाव करत नाही.
ओव्हन नसेल तर तुम्ही कढई / पातेल्यात मीठ / वाळू घालून त्यावर ताटलीत पिठाचा गोळा ठेवून झाकण ठेवून पाव भाजू शकता.
साहित्य (१ कप = २५० मिली )
मैदा ३ कप किंवा
मैदा आणि कणिक प्रत्येकी दीड कप
पिठीसाखर दीड टेबलस्पून
ड्राय यीस्ट दोन टीस्पून
मीठ दीड टीस्पून
वितळवलेलं बटर दोन टेबलस्पून
तीळ १ टीस्पून ऐच्छिक
दूध + बटर पाव भाजताना वरून लावायला
कृती
१. एका परातीत मैदा (मैदा + कणिक), मीठ, पिठीसाखर आणि यीस्ट घालून मिश्रण एकजीव करा.
२. त्यात वितळवलेलं बटर घालून मिश्रण एकजीव करा.
३. थोडं थोडं पाणी घालून सैलसर पीठ भिजवा.
४. एका मोठ्या वाडग्याला तेल लावून त्यात पीठ ठेवा. वरून थोडं तेल लावा आणि १ तासभर वाडगा झाकून ठेवा. पीठ छान फुलेल.
५. पिठाला हाताने बुक्के मारा. पिठातली हवा काढायची आहे.
६. एका तेल लावलेल्या पावाच्या साच्यामध्ये पीठ ठेवा. पीठ हाताने जरासं सपाट करून घ्या. हवे असल्यास वरून तीळ भुरभुरावा. हाताने किंचित दाब द्या. म्हणजे तीळ पिठात जातील.
७. पावाचा साचा ओल्या कपड्याने ४० –४५ मिनिटं झाकून ठेवा. पीठ पुन्हा फुलेल.
८. पिठावर दुधाचा ब्रश फिरवा.
९. प्री हीटेड ओव्हन मध्ये २०० डिग्री वर ३५–४० मिनिटं भाजून घ्या. पाव वरून गुलाबी झाला पाहिजे.
१०. पावावर बटर चा ब्रश फिरवा. खाण्याएवढे थंड झाले की चविष्ट पावाचा आस्वाद घ्या.


Your comments / feedback will help improve the recipes