
Olya Naralachya Karanjya (ओल्या नारळाच्या करंज्या) – Fresh Coconut Gujiya
This is Maharashtrian recipe of Karanji that generally prepared on Narali Paurnima (Raksha Bandhan). It uses fresh coconut and you can’t substitute it with desiccated coconut. You will not get that delicious taste.
Ingredients (makes 20-22 Karanji) (1 cup = 250ml)
All Purpose Flour (Maida) ½ cup
Semolina Fine (Rava Barik) ½ cup
Fresh scraped Coconut 1 cup
Milk ½ cup
Pure Ghee 1 tablespoon
Sugar ¾ cup
Cardamom (Velchi) Powder ¼ teaspoon
Saffron 2 pinch
Salt ¼ teaspoon (optional)
Ghee / Oil To Fry
Instructions
Prepare Dough
1. Mix together 1 tablespoon of pure ghee, a pinch of salt, semolina and All Purpose Flour.
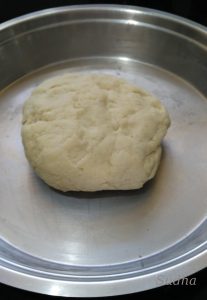
2. Bind it with milk to a stiff consistency dough.
3. Let it stand for 4-5 hours.
Prepare Filling
1. Mix fresh scraped coconut, sugar, a pinch of salt in a pan. To get a nice white filling, scrap only the white portion of coconut and leave aside the brown one near the shell. You can use this brown coconut for subji / curry.
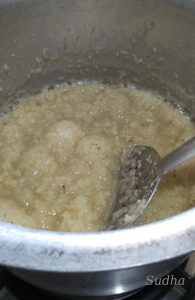
2. Cook on low flame, till the mixture starts getting dry, stirring all the time.
3. Add cardamom powder, saffron mixed with a spoonful of milk and mix well.
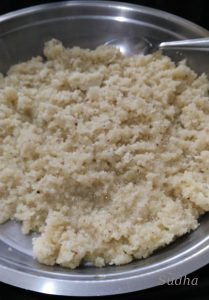
4. Spread it in a plate and cool to room temperature.
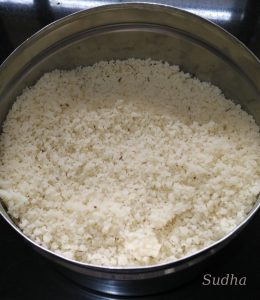
5. Grind it to make into a uniform coarse mixture; just pulse it for a few seconds.
Preparing Karanji
1. Make ½ inch round balls from the dough.
2. Roll each ball into a 3 inches circle (puri).
3. Place 1 tablespoon of Filing in the center of the Puri.
4. Fold the Puri over to make it a semi-circle.
5. Seal the edges using drop of milk, pressing gently with fingers.
6. Trim the edges. This is “Karanji”.
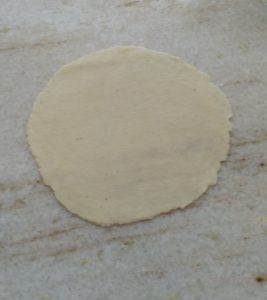
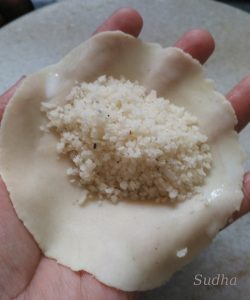
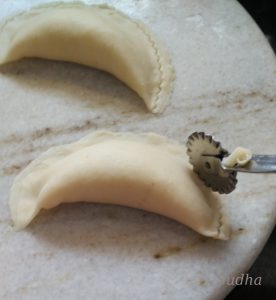
7. Keep the Karanji under a thin wet (not dripping) cloth, to avoid drying.
8. Repeat step 2 to 6 for all the dough.
Frying Karanji
1. Heat Ghee or Oil in a Wok on low flame.
2. Slip Karanji into the heated oil.
3. While frying keep splashing some heated oil on the top of Karanji so that the top side is also fried.
4. Turn/ Flip the Karanji in the oil.
5. Fry till light brown on both sides.
6. Remove from oil and place it on tissue (this helps to soak the excess oil).


Note: Since the filling is dry, it does not get soggy when you fry the Kanranji and You can store it for 3-4 days at room temperature.
==================================================================================
ओल्या नारळाच्या करंज्या
नारळी पौर्णिमेनिमित्त महाराष्ट्रात केला जाणारा लोकप्रिय पदार्थ. नारळ, साखरेचं सारण रव्या मैद्याच्या पारीत भरून तळलेल्या ह्या करंज्या अतिशय स्वादिष्ट लागतात.
साहित्य (२०–२२ करंज्यांसाठी) (१ कप = २५० मिली )
मैदा अर्धा कप
बारीक रवा अर्धा कप
खवलेला नारळ १ कप
साखर पाऊण कप
दूध अर्धा कप
साजूक तूप १ टेबलस्पून
मीठ पाव टीस्पून (ऐच्छिक)
वेलची पूड पाव टीस्पून
केशर चिमूटभर
तूप / तेल तळण्यासाठी
कृती
१. पारीसाठी मैदा, रवा, साजूक तूप गरम न करता, चिमूटभर मीठ एकत्र करा. आणि दुधामध्ये घट्ट भिजवा. ४–५ तास झाकून ठेवा.

२. सारणासाठी एका पातेल्यात नारळ, साखर, चिमूटभर मीठ एकत्र करून मंद आचेवर शिजवा. सारखं ढवळत राहा. मिश्रण घट्ट होत आलं की त्यात वेलची, दुधात भिजवलेलं केशर घालून मिक्स करा. एका ताटलीत काढून पसरून ठेवा. थंड झाल्यावर मिक्सर मध्ये घालून एक–दोनदा फिरवून घ्या. मिक्सर पल्स मोड मध्ये चालवा. छान रवाळ पावडर होईल.
पांढरं शुभ्र सारण बनवण्यासाठी नारळाचा फक्त पांढरा चव घ्या. करवंटीजवळचा काळा चव वेगळा खरवडून भाजी / आमटी साठी वापरा.


३. आता करंज्या करण्यासाठी भिजवलेलं पीठ मळून घ्या. छोटया लाट्या बनवून पातळ पुऱ्या लाटून घ्या. प्रत्येक पुरीत चमचाभर सारण घालून पुरी फोल्ड करून हलके दाबून बंद करा. चिकटण्यासाठी कडेला दुधाचा थेम्ब लावा. कातण्याने कडा कापून घ्या.


४. तयार करंज्या ओल्या कपड्याने झाकून ठेवा. १५–२० करंज्या झाल्या की गरम तेल/ तुपात मंद आचेवर तळून घ्या.
५. तळताना करंजीच्या वरच्या बाजूला तेल/तूप झाऱ्याने हलकेच उडवा. करंजीला छान मुखऱ्या आल्या पाहिजेत. दोन्ही बाजू तळून करंजी टिशू पेपर वर काढून घ्या.
६. खमंग खुसखुशीत करंज्या तयार आहेत.
टीप
१. ह्या करंज्या ३-४ दिवस टिकतात.


Mastch
Thank you.\nSudha
ताइ साजूक तुप गरम करुन घालवायचे का? (मोहन)
गरम नाही करायचं. गारच घालायचं.