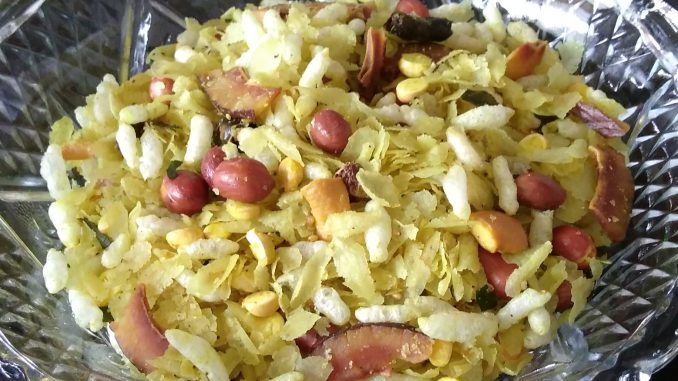
Tips for making Perfect Thin Poha Chivada (पातळ पोह्यांचा परफेक्ट चिवडा बनवण्यासाठी टिप्स)
पातळ पोह्यांचा परफेक्ट चिवडा बनवण्यासाठी टिप्स मराठी
1. If there is moisture in Poha, they don’t remain straight after roasting; they become curly.
Use any of the following methods to remove moisture from Poha:
a. Dry Poha in direct Sun
b. Heat Poha in Microwave for 2-3 minutes. You may have to make multiple batches depending on the quantity of Poha
c. This is something my mother used to do. Spread Poha in a plate and keep the plate under the Gas Burner while making Chapati.
2. The order in which you add ingredients to Oil while making Chivada is very important. Follow my recipe. It’s my mother’s 50 year old recipe – perfect and time tested. Do not add roasted Bengal Gram earlier; it becomes hard. Earlier I used to add Dry coconut slices in the oil after groundnut. But off late, I noticed that coconut slices were not crisp even after frying them well. So I fry dry coconut slices separately and then add to Chivada mixture along with other ingredients.
3. Roast Green Chilies till they turn black. Else Chivada may not remain crunchy after a few days.
4. The amount of Turmeric powder required for Chivada depends on how strong your Turmeric powder is. The one that I use is very strong. Hence I need small quantity. You may need more. Use your judgment. But remember, Chivada will be dark if you add more Turmeric Powder.
5. Do not add Powdered sugar in the oil. It will form lumps. Always add it in the end (as mentioned in the recipe).
6. Initially add less amount of Salt in Chivada. Generally this judgment goes wrong. After you mix all ingredients, if you need to add more salt, it can be added easily. But it is difficult to reduce the saltiness of Chivada. Also remember, Chivada becomes little more salty after it gets cool.
7. You can use Oil or Ghee (Clarified Butter) or Vanaspati (Hydrogenated Vegetable Oil) while making Chivada. I use Oil. Before using Vanaspati, please check the smell. If there is foul smell, do not use that Vanaspati.
8. Even after being so careful, what does one do is Chivada becomes salty?
If you find it out when Chivada is hot, then roast some Poha (Flattened rice) and Kurmure (Puffed rice) and mix in Chivada. Saltiness will reduce.
If you find it out after Chivada is cool, then roast some Poha (Flattened Rice) and Kurmure (Puffed Rice), leave them to cool. Upon cooling mix with Chivada. Do not reheat Chivada.
9. How do I store Chivada so that it remains Crunchy?
First important point – Do not cover the pan when Chivada is hot. Keep the pan open. When Chivada is warm, cover the pan with paper. When it cools further, transfer it to an airtight container but do not close the lid. Just place the lid on the top of container. When Chivada is completely cool, close the lid tightly.
10. In spite of all this what if Chivada does not remain crunchy?
While serving, take out the required amount of Chivada in a paper plate and heat it in Microwave for 30 seconds or 1 minute. Upon cooling, Chivada will be crunchy again.
If you don’t have a microwave, reheat Chivada in a pan on low flame till it’s crunchy.
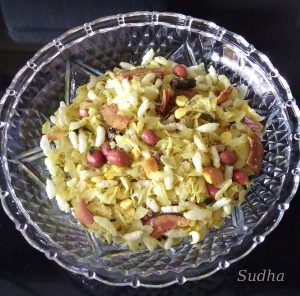
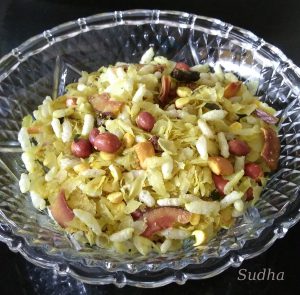
For detailed recipe of Thin Poha Chivada click on the link below:
==================================================================================
पातळ पोह्यांचा परफेक्ट चिवडा बनवण्यासाठी टिप्स
१. पोहे नरम असतील तर भाजल्यावर आक्रसतात. हे टाळण्यासाठी खालीलपैकी एक उपाय करू शकता:
१. पोहे उन्हात वाळवून घ्या
२. हल्ली खूपशा सदनिकांमध्ये ऊन येत नाही. असं असेल तर पोहे मायक्रोवेव्ह मध्ये २–३ मिनिटं गरम करून घ्या. अर्धा किलो पोहे २–३ वेळा घालावे लागतील.
३. एक सोपा उपाय माझी आई करायची. पोहे ताटात किंवा परातीत पसरून पोळ्या करताना गॅसच्या शेगडीखाली ठेवा. पोहे छान कुरकुरीत होतात.
२. चिवड्याचे साहित्य तेलात घालायचा क्रम महत्त्वाचा आहे. तळायला वेळ लागणारे पदार्थ आधी घालायचे. माझ्या रेसिपी त लिहिलंय तसं करा. माझ्या आईची ५० वर्षांपासूनची रेसिपी आहे. परफेक्ट आणि टेस्टेड. डाळं लवकर घालू नका. नाहीतर डाळं कडक होतं.पूर्वी मी खोबऱ्याचे काप शेंगदाणे अर्धवट तळून झाल्यावर फोडणीत घालत असे. पण खोबरं मऊ उरायला लागलं (हल्लीचे जिन्नस पाहिल्यासारखे नसतात). म्हणून हल्ली मी खोबऱ्याचे काप आधी तळून घेते.
३. हिरव्या मिरच्या तेलात काळ्या होईपर्यंत तळा. नाहीतर चिवडा मऊ पडतो.
४. चिवड्यात हळद किती घालायची हे तुमची हळद किती स्ट्रॉंग आहे ह्यावर अवलंबून आहे. माझी हळद खूपच स्ट्रॉंग असते. त्यामुळे मला कमी घालावी लागते. तुम्हाला कदाचित जास्त लागेल. तुमच्या अंदाजाने घाला. पण लक्षात ठेवा की हळद जास्त झाली तर चिवडा काळपट होतो.
६. पिठीसाखर कधीही तेलात घालू नका. साखरेच्या गुठळ्या होतात. पिठीसाखर नेहमी सर्वात शेवटी घाला (रेसिपी त लिहिल्याप्रमाणे ).
५. चिवड्यात मीठ घालताना कमीच घालावं. आपल्याला वाटतं की पातेलं भरून चिवडा आहे; जास्त मीठ लागेल पण मीठ जास्त लागत नाही. चव बघून चिवडा गरम असताना आणखी मीठ घालता येतं. पण मीठ जास्त झालं तर चिवडा सारखा करायला खूप मगजमारी करावी लागते. चिवडा गार झाल्यावर मीठ मुरतं आणि मीठ पुढे येतं. हे पण लक्षात ठेवा.
७. चिवडा तेलात किंवा तुपात बनवतात. मी तेलात बनवते. आम्हाला तसा आवडतो. तुम्हाला हवं असेल तर तूप घालू शकता – साजूक तूप किंवा वनस्पती. पण वनस्पती वापरायच्या आधी वास घेऊन बघा. खवट किंवा वेगळा वास आला तर ते वनस्पती तूप वापरू नका. चिवड्याला वास येईल.
८. एवढी काळजी घेऊन ही चिवडा खारट झाला तर काय करायचं ?
चिवडा गरम असतानाच कळलं की मीठ जास्त झालंय तर थोडे पोहे आणि कुरमुरे भाजून लगेच चिवड्यात मिक्स करायचे. खारटपणा कमी होईल.
चिवडा गार झाल्यावर कळलं की खारट झालाय तर पोहे आणि कुरमुरे भाजून गार करा आणि चिवड्यात मिक्स करा. चिवडा परत गरम करायची गरज नाही.
९. तयार चिवडा कसा ठेवायचा म्हणजे कुरकुरीत राहील? पहिली गोष्ट – चिवडा बनवल्यावर पातेल्यावर झाकण ठेवू नका. झाकणाला वाफ धरते आणि ती वाफ चिवड्यात पडून चिवडा हमखास मऊ पडतो. चिवडा कोमट झाल्यावर पातेल्यावर कागद झाकून ठेवा. आणखी थोडा गार झाल्यावर हवाबंद बरणीत / डब्यात भरा आणि झाकण वर तिरपे ठेवा. झाकण लावू नका. चिवडा पूर्ण गार झाल्यावर बरणी / डब्याचं झाकण घट्ट बंद करा. चिवडा छान कुरकुरीत राहील.
१०. एवढं करून ही चिवडा मऊ पडला तर काय?
खाताना जेवढा हवा असेल तेवढा चिवडा कागदाच्या प्लेट मध्ये घालून मायक्रोवेव्ह मध्ये ३० सेकंद / १ मिनिट गरम करायचा. गार झाल्यावर चिवडा कुरकुरीत होईल.
मायक्रोवेव्ह नसेल तर कढईत घालून मंद गॅसवर गरम करा.
पातळ पोह्यांच्या चिवड्याच्या सविस्तर रेसिपीसाठी ह्या लिंकवर क्लिक करा:


Your comments / feedback will help improve the recipes