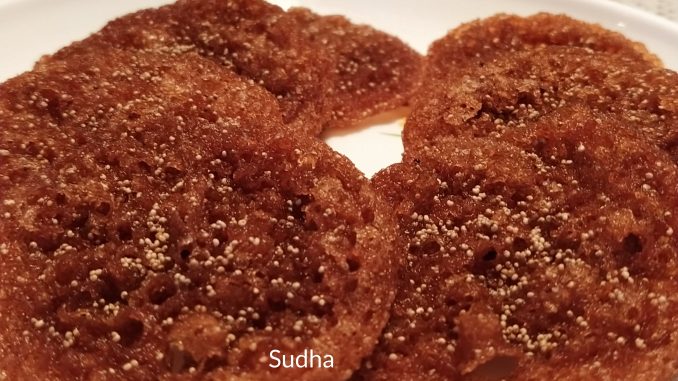
Anarase (अनरसे / अनारसे) – Maharashtrian Specialty Sweet Crunchy Indian Pastry
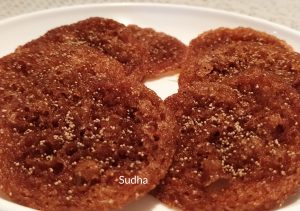
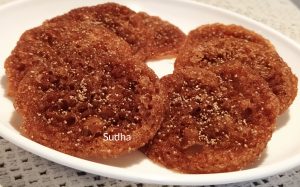
Anarase is a Maharashtrian specialty made from fermented rice and Jaggery (or sugar). A perfect Anarasa is light, crispy and porous. It should not puff like Puri while frying. It is a lengthy process to make Anarase flour as rice needs to be soaked for a few days. To make good Anarase, quality of the flour is as important as the right process of making Anarase. Since it is little different process for frying Anarase, I’ve attached a video for it. If you can manage this step, you will be able to get perfect Anarase. Note – you need two spatulas to fry Anarase.
If you buy Anarase flour, start from step 6.
Ingredients (1 cup = 250 ml)
Raw Rice 1 cup
Crushed Jaggery 1 cup
Ghee / Clarified Butter 1 teaspoon
Milk 2-3 teaspoon (as required)
Khuskhus (Poppy Seeds) 2-3 tablespoon
Ghee (Clarified Butter) to deep fry
Instructions
1. To make Anarasa Flour, wash rice and soak it in water for 3 days. Every day change the water. On the fourth day, rice will be fermented – it will smell sour.
2. Drain away the water from rice. Spread it on a cotton cloth for a few hours. Keep it in shade.
3. When the rice is little damp, using a grinder, grind it fine. Pass it through a fine sieve and discard the coarse flour.
4. Transfer Rice flour to a bowl. Add crushed Jaggery and mix. You can use the grinder to mix Jaggery. Use the grinder on pulse mode for a few seconds and take out the mixture in the bowl.
5. Add 1 teaspoon of Ghee and mix. Make tennis ball size balls of the flour. Store the balls in a plastic bag and keep it in an airtight plastic container. Store the flour for 3-4 weeks after which it will be ready for use.
6. Take out Anarase flour balls in a plate and break them. If there are any lumps, break them with your fingers.
7. If the mixture is dry, add milk 1 teaspoon at a time and bind dough. Be careful while adding milk. This dough requires very less milk. If you add too much milk, you will not be able to make Anarase. Dough should not be very soft.
8. Dry roast Poppy Seeds till light brown.
9. Knead the dough. Make small balls of the dough (dough balls similar to the ones that you make for Puri)
10. On a plastic sheet, apply little Ghee. Place the dough ball on the sheet and gently pat to make a thin round shape Puri.
11. Heat Ghee in a pan. You need to fry on low flame.
12. You need 2 spatulas to deep fry Anarase. Place one spatula half dipped in ghee.
13. Gently place Anarasa on this spatula. Anarasa will start spreading. Use second spatula to control the shape on Anarasa. Check the attached video.
14. After a minute or so, Anarasa will stop spreading. Now take it on one spatula and splash ghee on it using second spatula till Anarasa is brown (or light brown if you like it that way).
15. Anarasa should not be flipped while frying.
16. Once it is brown, take the spatula out of ghee. Using both spatulas press gently Anarasa to remove excess ghee.
17. Keep a plate ready with kitchen tissue paper spread on it.
18. Place Anarasa on the plate and sprinkle Poppy Seeds on it. Anarasa will be soft at this stage.
19. Fry all Anarase using the above process. Check this video:
20. Once Anarasa is cool, it gets crunchy. Transfer to an air tight container.
21. You can enjoy this delicious sweet for 3-4 weeks. No need to store in refrigerator.
Note
1. You need not place fried Anarasa on tissue paper. Place it in a plate and tilt the plate slightly so that excess Ghee will gather on lower side of the plate. You can use this ghee for kneading dough for Chapati.
==================================================================================
अनरसे / अनारसे – महाराष्ट्रीयन स्पेशालिटी
अनरसे हा दिवाळीच्या फराळातला स्वादिष्ट पदार्थ आहे पण करायला कठीण आणि वेळखाऊ आहे. अनरशाचं पीठ करण्यासाठी तांदूळ भिजवून ठेवावे लागतात. मग तांदूळ वाळवून, दळून आवडीप्रमाणे गूळ / साखर घालून पीठ आंबवावं लागतं. पीठ तयार झालं की अनरशाची पहिली पायरी पार पडली. पुढची कठीण पायरी म्हणजे अनरसे तळणे. हे जरा कौशल्याचं काम आहे. परफेक्ट अनरसे हलके, जाळीदार आणि कुरकुरीत असतात. तळताना ते पुरीप्रमाणे फुगू नयेत म्हणून अनरसे थापताना पातळ थापावे. गरम तुपात अनरसा घातल्यावर पसरतो. तेव्हा दोन झाऱ्यांच्या साहाय्याने त्याला पसरण्यापासून थांबवावे लागते. एखाद्या मिनिटांनी अनरसा पसरायचा थांबतो. तेव्हा तो एका झाऱ्यावर घेऊन दुसऱ्या झाऱ्याने त्यावर तूप उडवायचं. म्हणजे छान जाळी पडते. अनरसा तळताना परतायचा नाही. तळणीतून बाहेर काढून त्यावर खसखस पेरायची. अनरसे तळण्याचा व्हिडिओ पोस्टमध्ये टाकला आहे तो बघा म्हणजे कृती कळेल.
गुळापेक्षा साखरेचे अनरसे करायला सोपे असतात असं मी ऐकलंय. पण मी नेहमी गुळाचेच अनरसे करते.
तयार पिठाचे अनरसे करायचे असतील तर तिसऱ्या पायरीपासून कृती करा. विकत मिळणाऱ्या तयार पिठात के–प्र चं पीठ छान असतं. मी पूर्वी तेच आणायचे.
टिप्स
१. अनरश्याचे पीठ चांगलं असणं खूप महत्त्वाचं असतं. अनरसे कडकडीत झाले म्हणजे पीठ चांगलं नाही. पीठ जाड दळले असेल तर अनारसे कडकडीत होतात.
२. अनरसे मऊ पडले तर तुम्ही अनरसे बरोबर तळले नाहीत (मोठ्या आचेवर तळले) किंवा पीठ चांगलं नाही.
३. काही वेळा अनरसे तुपात टाकल्यावर विरघळतात. तेव्हा जरा जाड अनरसे थापून बघा किंवा आणखी थोडे दिवस पीठ आंबवायला ठेवा आणि नंतर अनरसे करा. तेही विरघळले तर अनरसे करण्याचा नाद सोडून द्या आणि थोडी कणिक घालून पुऱ्या करा आणि अनरश्याच्या पुऱ्या असा नवीन पदार्थ बनवून पीठ संपवा. माझ्या बाबतीत २ वेळा असं झालंय. अगदी नावाजलेल्या दुकानातून पीठ आणलं आणि मग पुऱ्या करून संपवलं.
४. अनरश्याचा रंग त्यात साखर आहे की गूळ यावर ठरतो. गुळाचे अनरसे काळसर / तपकिरी होतात. यात चूक / बरोबर असं काही नाही. म्हणजे तिचा अनरसा माझ्या अनरश्यापेक्षा गोरा कसा हा प्रश्न पडू देऊ नका.
५. खसखस नेहमी अनरसे तळल्यावर घाला. आधी घातली तर ती तुपात उतरून तूप खराब होतं.
६. अनरसे बिघडले तर दुरुस्त करता येत नाहीत हे लक्षात ठेवा आणि फार वाईट वाटून घेऊ नका. माझे ३ प्रयत्न फसले आहेत. पण मी प्रयत्न आणि आशा सोडली नाही. नंतर अनरसे छान व्हायला लागले.
साहित्य (१ कप = २५० मिली )
तांदूळ १ कप
चिरलेला गूळ १ कप
साजूक तूप १ टीस्पून
दूध २–३ टीस्पून (जरूर पडल्यास)
खसखस २–३ टेबलस्पून
तूप तळण्यासाठी
कृती
१. तांदूळ धुवून ३ दिवस पाण्यात भिजवून ठेवा. रोज पाणी बदला. चौथ्या दिवशी आंबूस वास यायला लागेल. तांदुळातलं पाणी निथळून तांदूळ सुती कापडावर पसरून सावलीत ठेवा. तांदूळ पूर्ण वाळवायचे नाहीत. तांदूळ किंचित ओलसर असतानाच मिक्सरमध्ये बारीक वाटून घ्या. बारीक चाळणीने पीठ चाळून घ्या. तांदुळाचा जाड रवा काढून टाका – तो दुसऱ्या कोणत्याही पदार्थात वापरू शकता.
२. तांदुळाच्या पिठात गूळ घालून मिश्रण एकजीव करा. मिश्रण मिक्सरमध्ये घालून पल्स मोड वर काही सेकंद फिरवून घ्या. आता मिश्रणात साजूक तूप घालून पिठाचे गोळे करा आणि प्लास्टिकच्या पिशवीत घालून प्लास्टिकच्या हवाबंद डब्यात ठेवून द्या. ३–४ आठवड्यानंतर अनारश्याचे पीठ तयार होतं.
३. अनरश्याच्या पिठाचे गोळे एका परातीत काढून मोडून घ्या. गुठळ्या असतील तर हाताने मोडून घ्या.
४. पीठ सुकं असेल तर एक–एक टीस्पून दूध घालून मध्यम सैल पीठ भिजवा. जास्त दूध घातलं तर पीठ सैल होईल आणि अनरसे थापता येणार नाहीत.
५. खसखस सुकी भाजून वेगळी ठेवा.
६. पिठाचे पुरीच्या गोळ्यासारखे गोळे करून घ्या. एका प्लास्टिकच्या कागदाला / बटर पेपरला थोडं तूप लावून घ्या. एकेक गोळा कागदावर ठेवून हलक्या हाताने पातळ थापून घ्या.
७. कढईत तूप गरम करून घ्या. अनरसे मंद आचेवर तळायचे असतात. दोन झारे तयार ठेवा.
८. एक झारा अर्धा तुपात बुडेल असा ठेवा आणि त्यावर अनरसा अलगद सोडा.
९. गरम तुपात अनरसा घातल्यावर पसरतो. तेव्हा दोन झाऱ्यांच्या साहाय्याने त्याला पसरण्यापासून थांबवावे लागते. एखाद्या मिनिटांनी अनरसा पसरायचा थांबतो.
१०. तेव्हा तो एका झाऱ्यावर घेऊन दुसऱ्या झाऱ्याने त्यावर तूप उडवा. म्हणजे छान जाळी पडते. अनरसे तळण्याचा हा व्हिडिओ बघा.
११. अनरसा तळताना परतायचा नाही. अनरसा तळून झाला की तो एका झाऱ्यावर घेऊन दुसऱ्या झाऱ्याने हलकेच दाबून जास्तीचं तूप काढून टाका. तळणीतून बाहेर काढून त्यावर खसखस पेरा. तळलेला अनरसा टिश्यू पेपर वर ठेवा किंवा ताटलीत ठेवून ताटली जरा कलती ठेवा म्हणजे जास्तीचं तूप ताटलीच्या कडेला जमा होईल. हे तूप तुम्ही पोळ्यांची कणिक भिजवताना वापरू शकता.
१२. अनरसे गरम असताना नरम असतात. गार झाल्यावर कुरकुरीत होतात. अनरसे गार झाल्यावर हवाबंद डब्यात भरून ठेवा. अनरसे ३-४ आठवडे फ्रिजमध्ये न ठेवता छान राहतात.


Your comments / feedback will help improve the recipes